
Piano roll editors are indispensable tools for me when it comes to MIDI sequencing. They allow precise control over note placement, timing, and other musical parameters. Here, I’d like to describe how I developed my own piano roll editor.
The Essential Guide: EditViewState
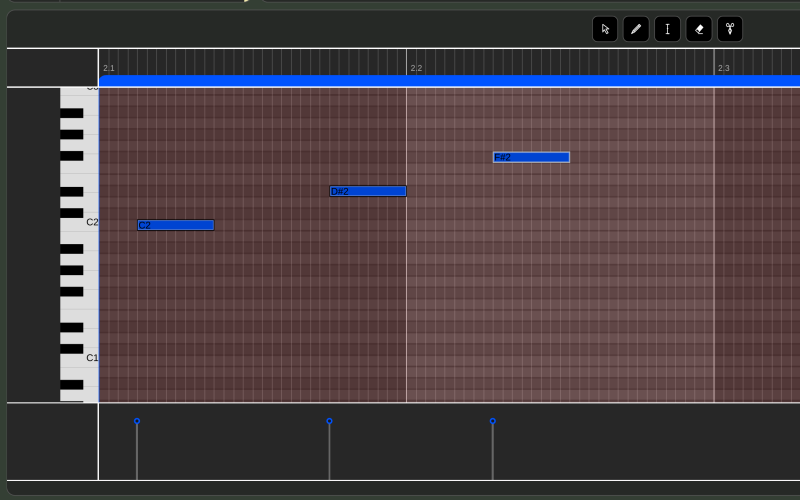
EditViewState. I used this class as the central hub to store and manage visual settings and state information for my Tracktion Engine edit. These settings are saved along with the edit and restored when the edit is loaded again. These states are the bridge between the underlying MIDI data and their visual representation on screen.
- View position & zoom: I used
EditViewStateto track the visible area of my edit, both horizontally (time or beats) and vertically (pitch in the piano roll). I also stored the zoom levels there. - Snap settings: Here, I managed the current snap settings (e.g., snap to grid, beat, or bar) that I needed for note quantization.
EditViewState provides methods to convert between time/beat positions and pixel coordinates:
beatsToX(): Converts a beat position into a pixel coordinate on the horizontal axis.xToBeats(): Converts a pixel coordinate back into a beat position.timeToX(): Converts a time position (in seconds) into a pixel coordinate.xToTime(): Converts a pixel coordinate back into a time position.
These conversion methods are necessary for drawing the notes, interpreting mouse input, and ensuring that the piano roll editor always stays in sync with Tracktion Engine’s internal data.
I. Understanding the Core Concepts
First, I had to internalize the basic concepts:
- Tracktion Engine’s MIDI data: At its core, Tracktion Engine stores MIDI data in
MidiClipobjects. I primarily worked with the following: MidiSequence: Represents the collection of MIDI events within a clip. This is where I found the actual notes.MidiNote: Individual note events containing pitch, velocity, start time, duration, etc.- Visual representation: My piano roll had to visually map the note information:
- Vertical axis: Represented pitch (typically like piano keys).
- Horizontal axis: Represented time (bars, beats, or timecode).
- Note rectangles: The dimensions of these rectangles had to reflect pitch, start time, and duration of a note.
II. Building the Piano Roll Editor (Step by Step)
Here’s how I proceeded:
1. Create a custom component
- I derived a new class (let’s call it
MyPianoRollEditor) fromjuce::Component. - I added important data members
EditViewState& evs: To access project settings, zoom, and view positions. This reference was essential.te::Track::Ptr track: To reference the track containing the MIDI clips.
2. Draw the piano roll grid (paint method)
- Key lines: I drew horizontal lines for each piano key (white and black). With
juce::MidiMessage::isMidiNoteBlack(), I could easily alternate the colors. - Time grid: I drew vertical lines for bars, beats, and subdivisions. Here,
EditViewStatecame into play to convert time positions into pixel coordinates. - Notes:
- I iterated through the
MidiClipobjects on the track. - For each
MidiNotein theMidiSequenceof the clip:- I calculated the rectangle of the note based on its pitch, start time, and duration.
- I drew the rectangle using
g.fillRect(). - I also considered adding visual hints for velocity, selected notes, and notes under the mouse pointer.
- I iterated through the
3. User interaction
- Mouse handling: I implemented the mouse listener methods (
mouseDown,mouseDrag,mouseUp) inMyPianoRollEditor. - Note creation (draw mode):
mouseDown: Here, I determined the pitch and quantized start time from the mouse position.- I created a new
MidiNoteand added it to the appropriateMidiSequence. mouseDrag: I adjusted the end time of the note with this.mouseUp: Here, the note’s duration was finalized.
- Note selection (pointer mode):
mouseDown: I checked if a note was under the mouse and added/removed it from the selection accordingly.mouseDrag: If a selected note was dragged, I updated its position.
- Lasso selection: I realized that I would probably need a tool to select multiple notes in a rectangular area. I solved this with a separate component that overlaid the piano roll.
- Vertical/horizontal scrolling: I implemented scrolling via the mouse wheel and updated
EditViewStateto reflect the new view position.
4. Time/beat/pixel conversion
- Tracktion Engine internally primarily uses time positions (seconds) and beat positions for MIDI data.
- I constantly had to convert these into pixel coordinates to draw on screen, and vice versa to interpret mouse events.
- Here again,
EditViewStatewas my most important tool. I extensively used methods likebeatsToX(),xToBeats(),timeToX(), andxToTime().
5. Working with the selection manager (te::SelectionManager)
- It was crucial for me to use the
SelectionManagerto keep track of selected notes. This was the only way other components (like a velocity editor) could access the selected data.
// Add a note to the selection
evs.m_selectionManager.select(note, false); // false = do not add to existing selection

// Retrieve selected notes
auto selectedNotes = evs.m_selectionManager.getItemsOfType<te::MidiNote>();
6. Additional features
- Velocity editor: A visual editor for adjusting note velocities.
- Tool modes: Various tools for drawing, selecting, deleting, splitting notes, etc.
- Quantization: Aligning note positions to the grid based on the project’s current time signature.
- Keyboard component: A visual/virtual MIDI keyboard.
III. Example snippets
Here are some code snippets from my implementation showing how I implemented parts of it:
// Inside MyPianoRollEditor::paint(juce::Graphics& g)
auto area = getLocalBounds();

// Draw key lines
for (int i = lowestVisibleNote; i <= highestVisibleNote; ++i) {
    g.setColour(juce::MidiMessage::isMidiNoteBlack(i) ? colours::black : colours::white);
    auto y = noteToY(i); // My function for converting note to Y coordinate
    g.drawLine(area.getX(), y, area.getRight(), y);
}

// Draw time grid (bars/beats)
for (double beat = startVisibleBeat; beat <= endVisibleBeat; beat += beatGridSpacing) {
    auto x = evs.beatsToX(beat); // Use EditViewState for conversion!
    g.setColour(colours::lightgrey);
    g.drawLine(x, area.getY(), x, area.getBottom());
}

// Draw notes
for (auto clip : getMidiClipsOfTrack()) { // My function to get clips of the track
    for (auto note : clip->getSequence().getNotes()) {
        auto noteRect = getNoteRect(note); // My function to calculate the note rectangle
        g.setColour(track->getColour()); // Track color or adapted by velocity
        g.fillRect(noteRect);
    }
}
IV. Key Takeaways
Two points were especially important to me during development:
EditViewStateis the key to mapping! I really had to familiarize myself with how to use its time/beat-to-pixel conversion methods.- Use the
SelectionManager. Properly managing the selection was essential to ensure a smooth editing experience and enable integration with other parts of the editor.
Leave a Reply